
Artificial intelligence is a common topic in CAD, but too often it’s talked about in big, abstract terms. To make the topic more concrete for Octave BricsCAD users, we asked two of our in-house experts, Mark Tooley and Julie Keverian, to answer ten questions about how AI-driven tools work inside the software. From predictive commands to drawing cleanup and guided editing, they

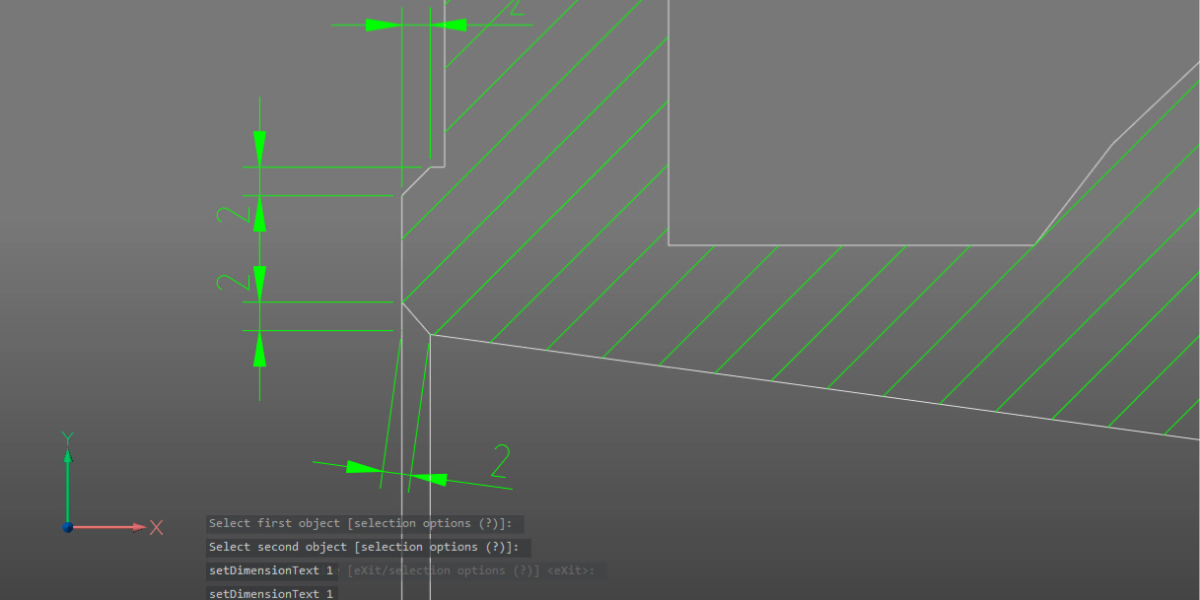
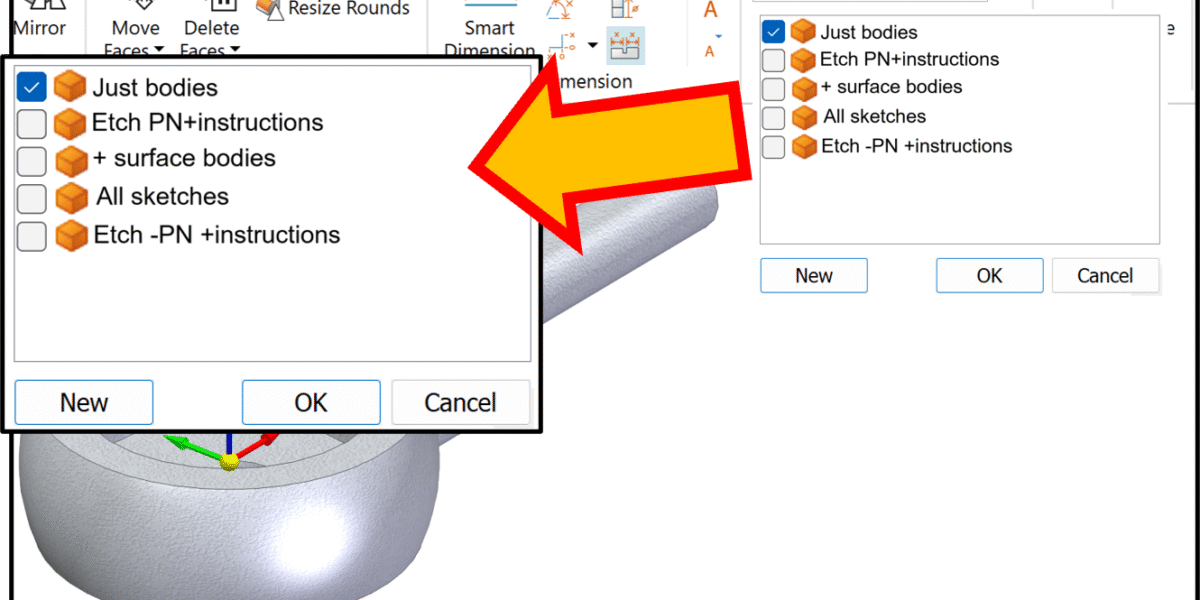
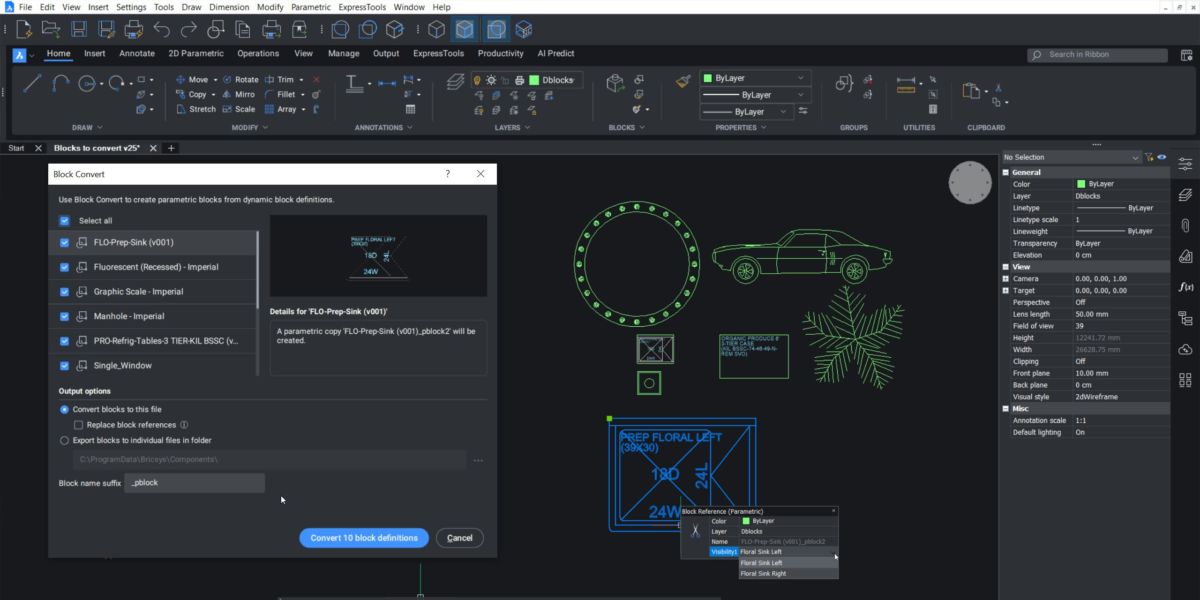
Dynamic blocks have always been a bit of a one-way street in BricsCAD. You could use them, stretch them, flip them, and switch their visibility states, but only if someone else had defined that behavior first. The moment you wanted to change the logic behind the block, you hit a wall. BricsCAD V26 removes that wall. It’s now possible to

Most land surveyors do not work in one tool. You collect data in the field. You clean it somewhere else. You label it in another system. You prepare drawings in CAD. And when something changes, you repeat the process. Every handover costs time. Every export risks data loss. Every manual step creates errors. BricsCAD V26 and its Survey Toolset is designed
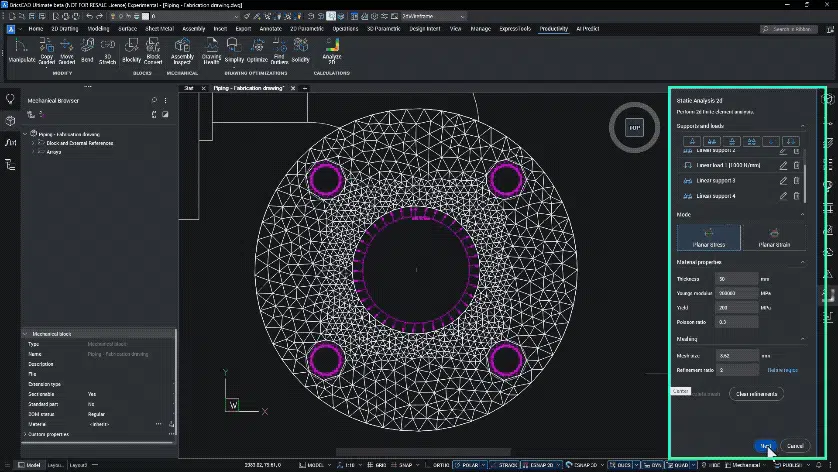
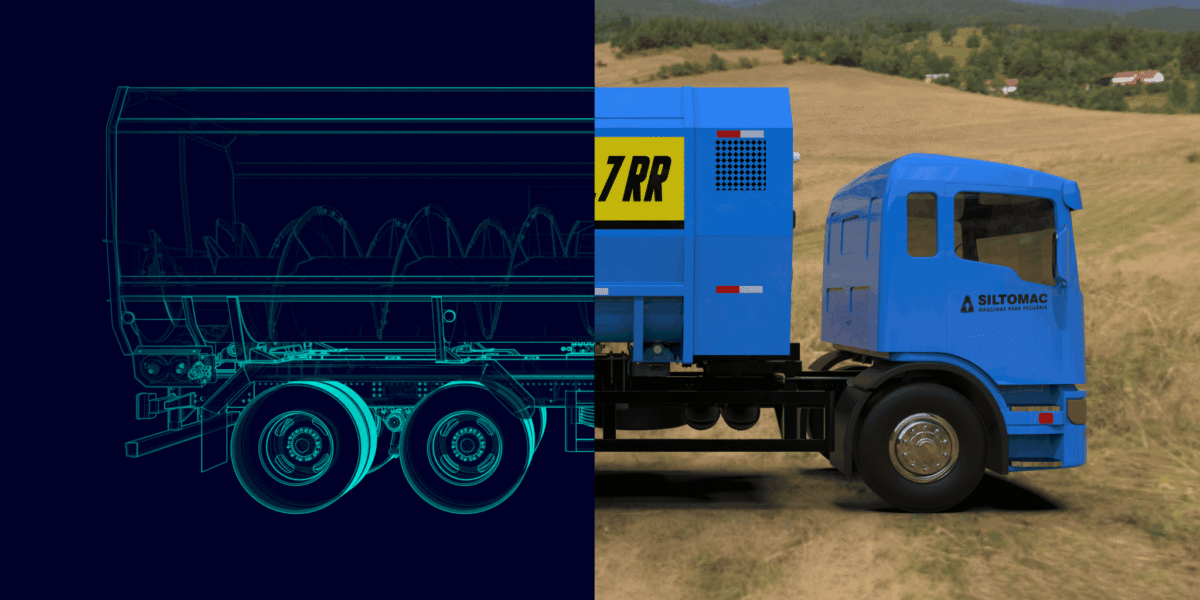
Manufacturing teams don’t struggle because they lack features. They struggle because design data doesn’t always survive the journey to production intact. Assemblies arrive from different systems. Models look correct, but behave unpredictably. Drawings can require manual cleanup that slows everything down. With the release of BricsCAD® V26, the focus is on strengthening the entire path from any design data to complete

Why IFC Matters More Than Ever As infrastructure projects grow in complexity—spanning roads, bridges, rail systems, and utilities—the need for open, interoperable data has never been greater. Building Information Modeling (BIM) is no longer just for vertical construction; it’s now a cornerstone of digital infrastructure workflows. At the heart of this transformation is IFC (Industry Foundation Classes), the open standard
You can’t design confidently if you don’t understand the ground you’re building on. BricsCAD V26 introduces new tools that make it simple to cut through your model, visualize the terrain, and keep everything dynamic as your project evolves. Let’s explore how these tools work together and how they can work for you. Cut Through the Terrain With Ease Starting with your
Already working in BricsCAD V25 or V25.2? You’re already on a strong foundation. But BricsCAD V26 adds speed, clarity, stability, and just enough smart automation to noticeably smooth out your daily work. To make this upgrade guide actually useful, we’ve organized it by who you are and how you use BricsCAD, so you can quickly see what matters for your workflow. For

Manufacturing teams don’t struggle because they lack features. They struggle because design data doesn’t always survive the journey to production intact. Assemblies arrive from different systems. Models look correct, but behave unpredictably. Drawings can require manual cleanup that slows everything down. With the release of BricsCAD® V26, the focus is on strengthening the entire path from any design data to complete
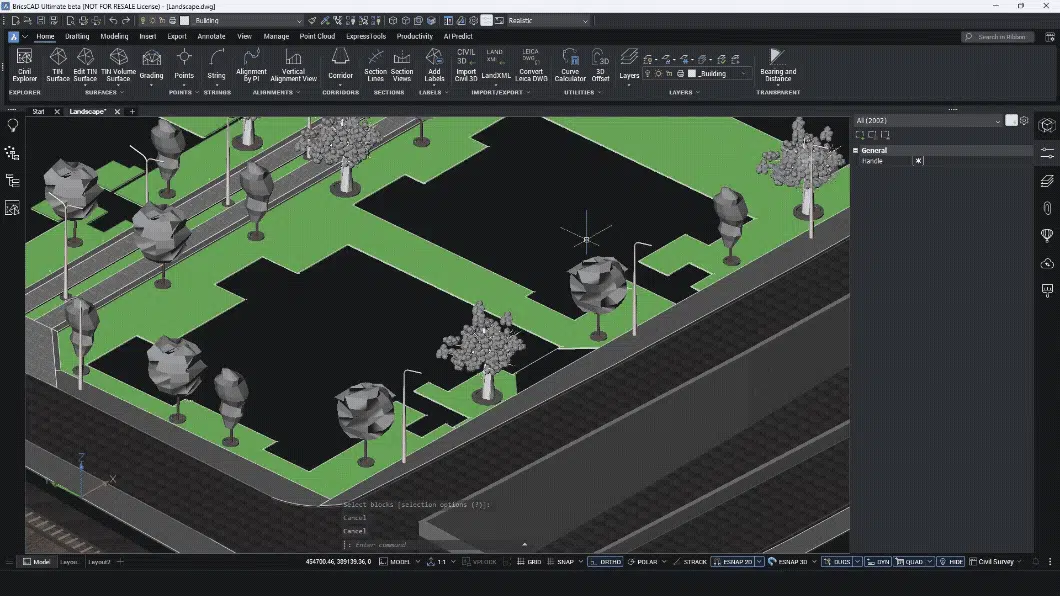
Most land surveyors do not work in one tool. You collect data in the field. You clean it somewhere else. You label it in another system. You prepare drawings in CAD. And when something changes, you repeat the process. Every handover costs time. Every export risks data loss. Every manual step creates errors. BricsCAD V26 and its Survey Toolset is designed
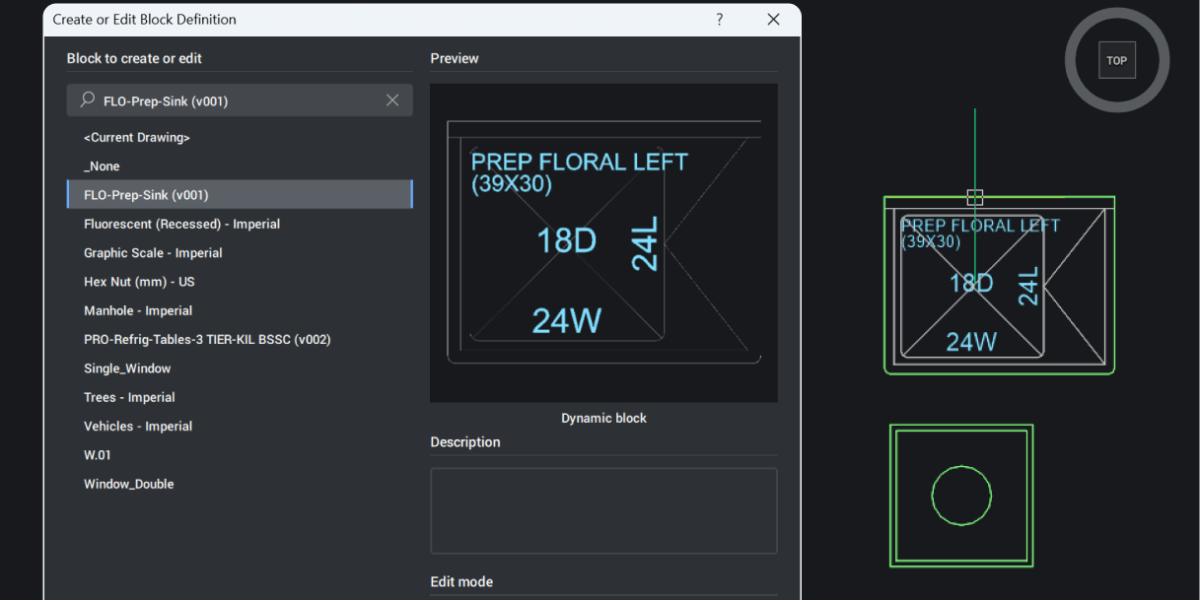
Dynamic blocks have always been a bit of a one-way street in BricsCAD. You could use them, stretch them, flip them, and switch their visibility states, but only if someone else had defined that behavior first. The moment you wanted to change the logic behind the block, you hit a wall. BricsCAD V26 removes that wall. It’s now possible to
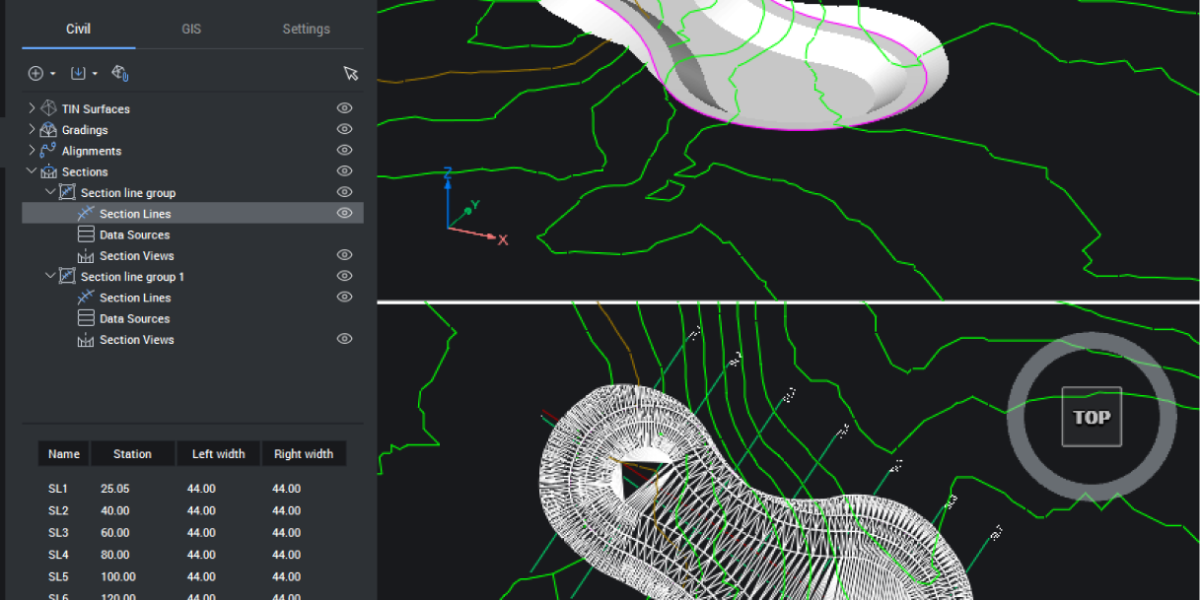
You can’t design confidently if you don’t understand the ground you’re building on. BricsCAD V26 introduces new tools that make it simple to cut through your model, visualize the terrain, and keep everything dynamic as your project evolves. Let’s explore how these tools work together and how they can work for you. Cut Through the Terrain With Ease Starting with your

Why IFC Matters More Than Ever As infrastructure projects grow in complexity—spanning roads, bridges, rail systems, and utilities—the need for open, interoperable data has never been greater. Building Information Modeling (BIM) is no longer just for vertical construction; it’s now a cornerstone of digital infrastructure workflows. At the heart of this transformation is IFC (Industry Foundation Classes), the open standard
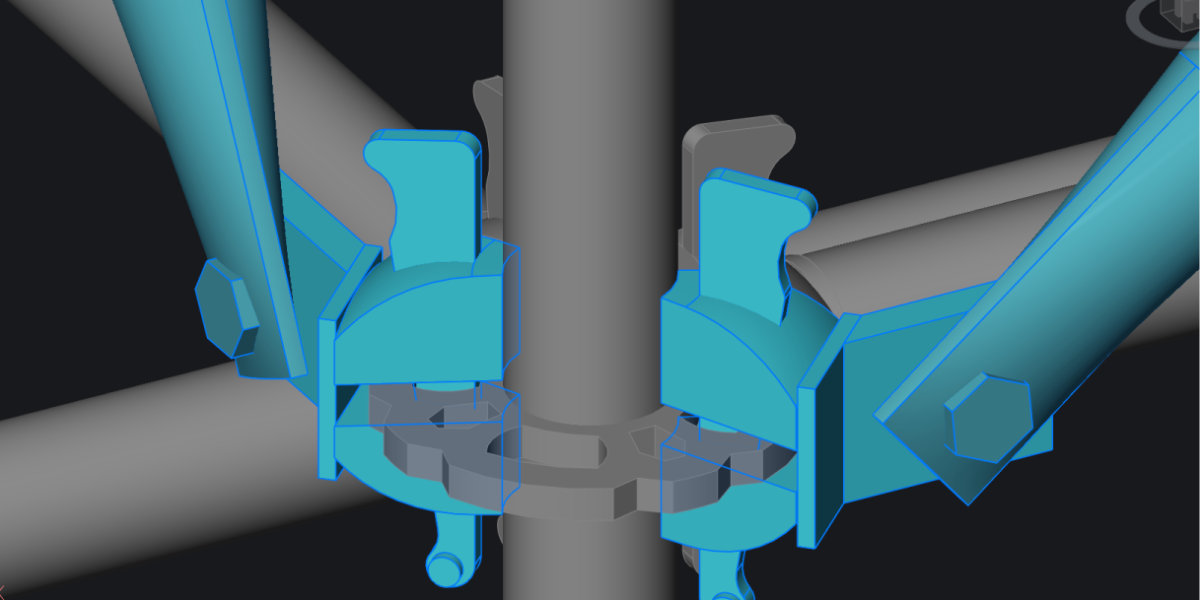
BricsCAD V26 brings a set of focused improvements for designers working across industries. The updates target the everyday work of design and documentation: block management, grip editing, section views, interference checking, annotations, and performance. If you’re drafting floor plans, designing equipment, documenting assemblies, or modeling products, these changes will make your workflow faster and less frustrating. The headline feature is
BricsCAD® V26 is here, bringing more than 60 new and enhanced features to help you move more quickly and efficiently from design to production. This release is about flow. Which means fewer clicks and delays, and more control while you’re drafting, modeling, fabricating, or surveying. No matter which version of BricsCAD you’re currently running, you’re in for a meaningful performance boost. From V22
Work smarter, not harder, with AI that understands and improves how you work Designcenter Solid Edge 2026 puts Artificial Intelligence (AI) to work where you need it most, saving you time, clicks and keeping your designs moving forward. Snap together assemblies in seconds with Magnetic Snap Assembly, which automatically detects the right constraints, so you don’t have to. Let the
Accelerate design with Magnetic Snap Assembly With the launch of Designcenter Solid Edge 2026, we’re publishing a series of blogs to spotlight the release’s most exciting new features and enhancements. In this post, we’ll explore the latest updates with Assembly and Productivity. The new Magnetic Snap Assembly command uses built-in AI to automatically snap and constrain components to faces or
Performance meets flexibility powered by AI With the launch of Designcenter Solid Edge 2026, we’re publishing a series of blogs to spotlight the release’s most exciting new features and enhancements. In this post, we’ll explore the latest updates to Solid Edge. The future of product design is here. Designcenter Solid Edge® 2026 delivers next-generation productivity with powerful AI tools, immersive visualization and
The backbone of modern engineering: CAD software. From ingenious consumer products to finely crafted machine parts and building designs, everything starts with a precise digital drawing. But anyone who’s ever used CAD software knows how steep the learning curve can be. Mastering all the commands and workflows can take months—sometimes years. The golden rule: software should truly unburden the designer. Hence the “A” in
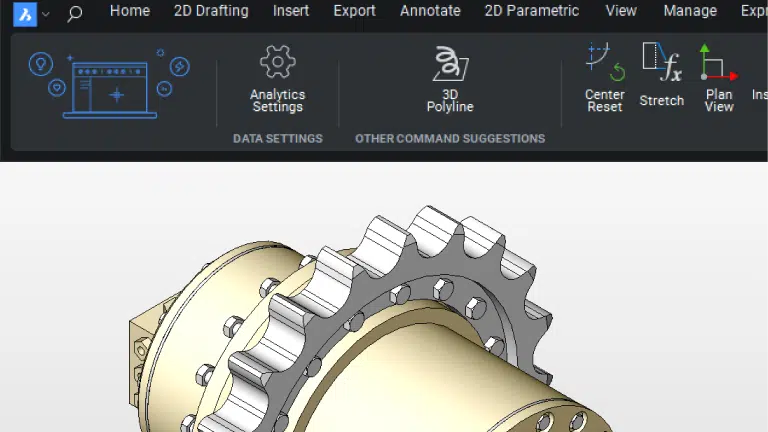
AI in CAD is often pitched as futuristic or experimental. In BricsCAD®, it’s already at work solving everyday frustrations. AI Predict is one of those deceptively simple tools that makes a big difference: it learns how you use BricsCAD and suggests the commands you need, right when you need them. Less time spent hunting through menus means more time spent in flow.
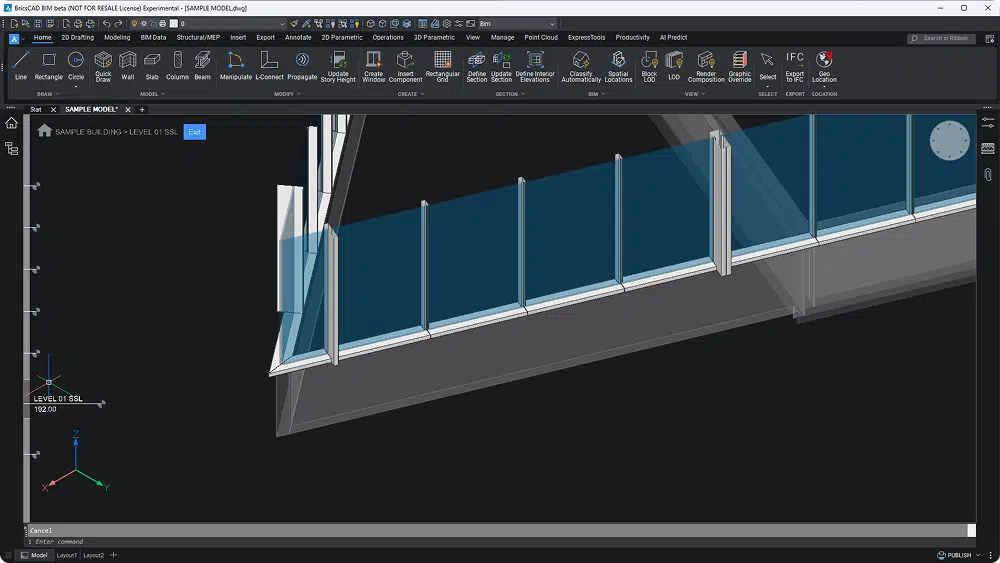
The Information Delivery Specification (IDS), developed by buildingSMART, is a standardized framework designed to address this need. And now, with the implementation of IDS XML into BricsCAD BIM, users gain a powerful tool for automating compliance and aligning deliverables with project requirements. The Role of LOD and LOI in Construction Projects LOD focuses on the geometric fidelity of BIM models, detailing the progression from basic