
If you’re thinking about making the switch to BricsCAD for AutoCAD® users, even with minimal AutoCAD® experience, the transition is easy and painless. BricsCAD works very much like AutoCAD® and supports much of the same functionality including Xrefs, plotting, sheetsets, PDF attach/import, viewports, etc. The tips and pointers here will help speed up your transition as well as provide familiarity and insight into some of the unique and powerful features within BricsCAD.
In 2018, I started my journey into BricsCAD. I’m now pleased to bring you my top 24 tips to accelerate your BricsCAD V20 journey. This list is updated from my 23 tips to accelerate your BricsCAD V19 Journey created in partnership with Brandon Loehr.
1 The Drafting Environment
Start BricsCAD in the Drafting environment. The Drafting environment uses the Drafting workspace, to most closely match the default AutoCAD® interface (available in both light and dark mode).
You can easily change workspaces at any time. In addition to changing the UI elements that are displayed, BricsCAD also changes relevant system variables to optimize each workspace environment.
2 Customize
Customize user interface elements, such as the ribbon and toolbars, using the CUSTOMIZE(CUI) command, similar to AutoCAD®. Like AutoCAD®, you can load existing customizations. And, in BricsCAD, you can even manage your customizations individually. Easily identify what’s been added, modified or removed and select which ones to retain or restore to defaults. Download the free, customization eBook for advanced users or read the Customization blog posts.

3 New/Open/Save/SaveAs tools
Access New/Open/Save/SaveAs tools from multiple locations including the toolbar at the top of the application window or by typing at the command line as you’re used to in AutoCAD®. You’ll notice BricsCAD creates, opens, and saves as a native .dwg file format. It works seamlessly with your existing .dwg, .dwt, and .dxf files including the most recent .dwg file format and as far back as Release 11 (.dwg) and Release 9 (.dxf).

4 Commands and Options
Enter commands and options in the familiar Command window at the bottom of the workspace. As you begin typing, BricsCAD automatically populates the list of possible commands. It even supports mid-string search.
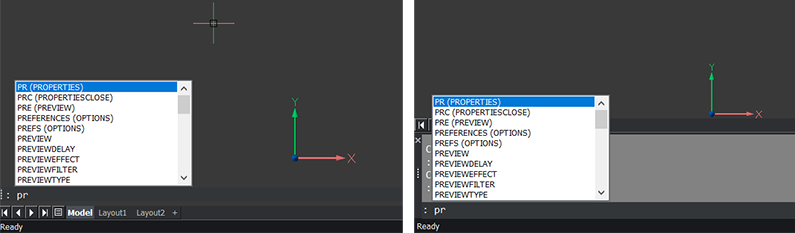
You’ll find that many of your favorite and most common commands are similar, if not the same as AutoCAD®. For example, standard commands like; LINE (L), CIRCLE (C), COPY (CO), DISTANCE (Di), and MATCHPROP (Ma) work as you would expect. Many of the same shortcuts such as Ctrl+1 for Properties, F3 for Snap and Escape work as well. Learn them all here.
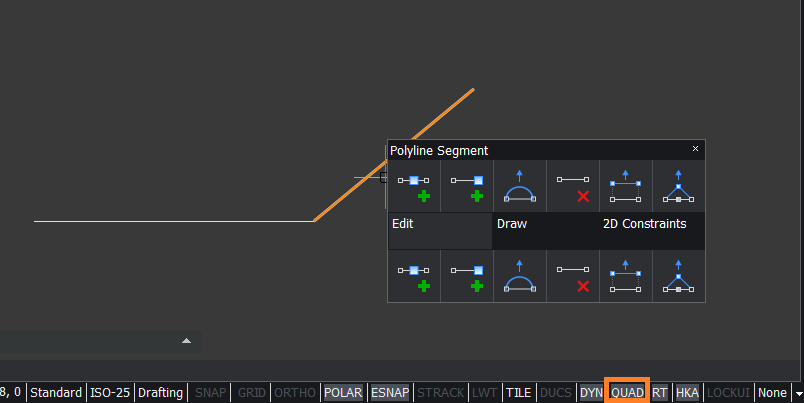
5 The Quad
Select entities and right-click to access relevant tools from the intelligent Quad cursor. It can help streamline your design and drawing process. If you’re not yet ready to experiment with the Quad, you can turn it off on the status bar. Just as easily turn it back on when you’re ready.
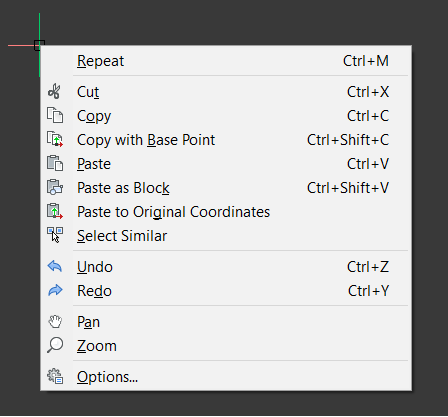
6 Right-click menus
Select entities and press the right mouse button for an extended time to access the traditional right-click menus you’re familiar with from AutoCAD®.
7 The Manipulator
Hold down the left mouse button for a little longer than normal when selecting an entity to easily access the Manipulator. It won’t display until you release the mouse button. You can move, copy, rotate, scale and mirror the selected entity by clicking on various parts of the Manipulator. You can even copy (C) or repeat (R) the entity as you manipulate it. This also works for selecting sub-entities by pressing the Ctrl key during selection.
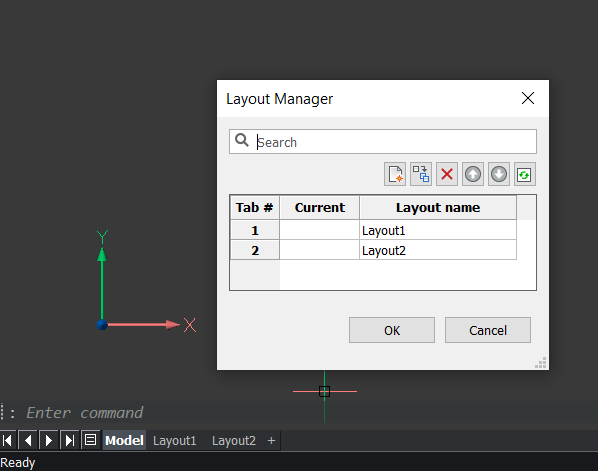
8 LAYOUTMANAGER
In addition to the familiar methods for switching between Model and Layout tabs, you can use the Layout Manager. Access it from the icon to the left of the Model tab or with the LAYOUTMANAGER command. In the Layout Manager, you can easily add, remove, arrange or switch between layouts.
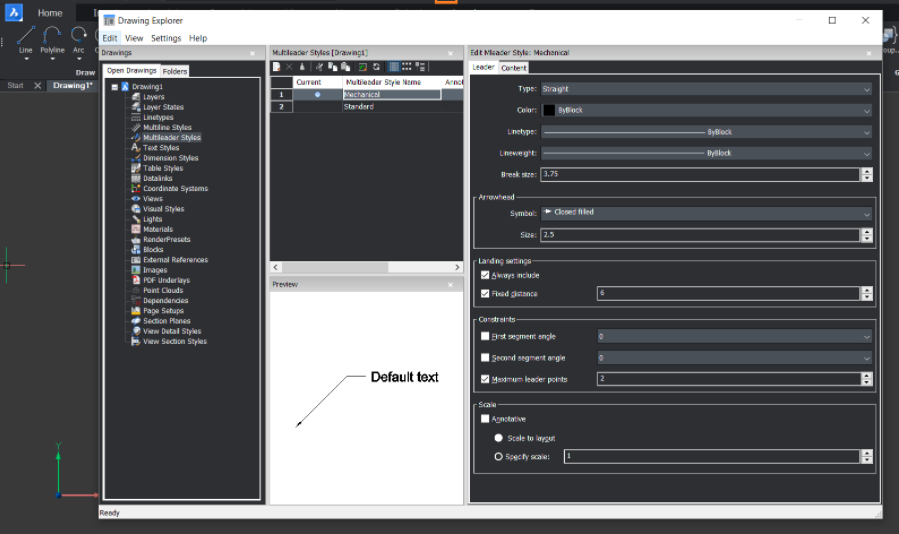
9 The Drawing Explorer
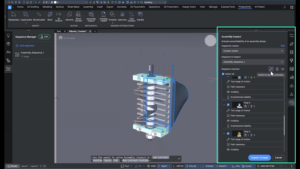
Use Drawing Explorer to create and edit styles and other content defined in your drawing. This includes Text, Dimension, and Table styles, Linetypes, Blocks, and much more. Access Drawing Explorer with the EXPLORER command or use the Drawing Explorer button from the toolbar at the top of the application window. Select the type of content from the tree on the left side. Familiar commands such as STYLE, DDIM, and LINETYPE automatically open Drawing Explorer with the relevant content type selected.
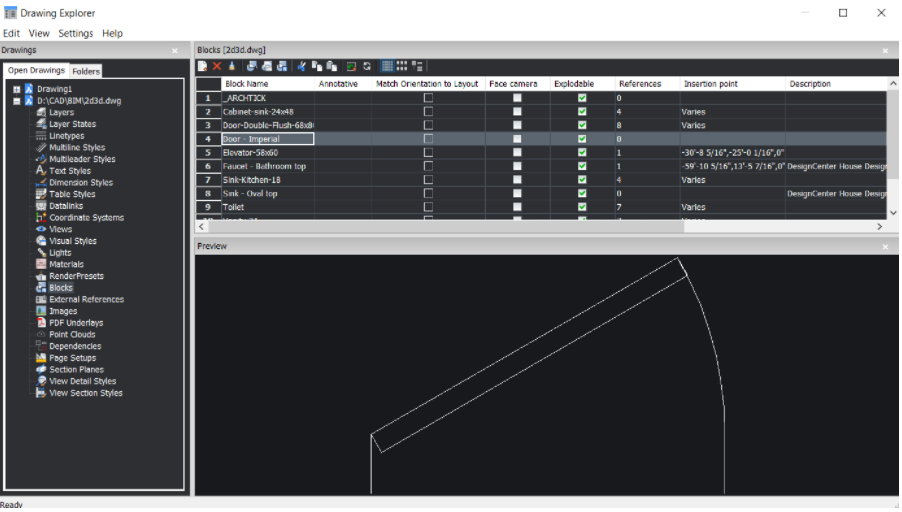
10 Blocks
Create block definitions using the BLOCK command to access the Block Definition dialog box, very much like you do in AutoCAD®.
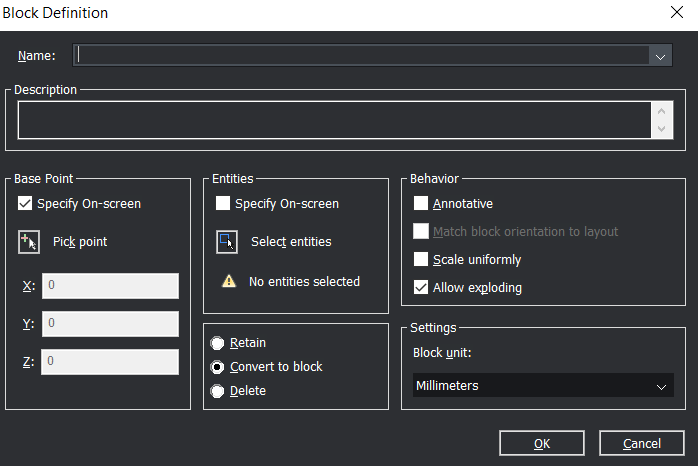
You can also create and manage block definitions using the Drawing Explorer. In here you can view how many instances of a block are inserted as well as other useful properties. Discover the difference between dynamic and parametric blocks with this article.
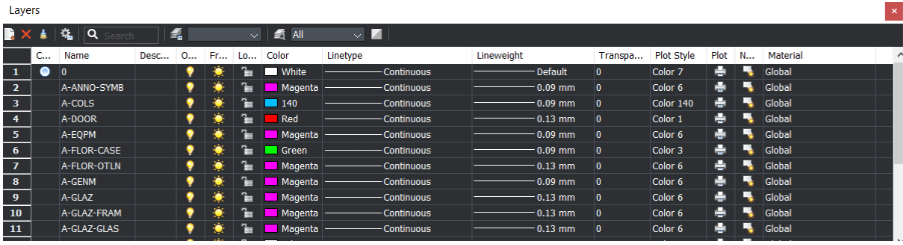
11 Layers
View, create and modify layers in the Drawing Explorer or in a separate Layers panel that can remain open while you work in your drawing. You can open the Layers panel from the Layers tool on the Home tab of the ribbon or the LAYER (LA) command.
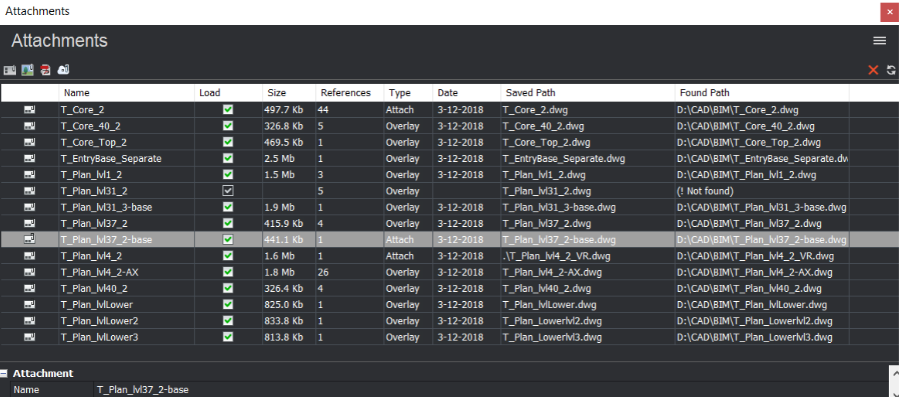
12 The Attachment Panel
Attach and manage externally referenced files including DWGs, images, PDFs, and Point Clouds in the Modeless Attachments panel (XREF command). Like the External References manager in AutoCAD®, the Attachments panel can remain open while you use other commands.
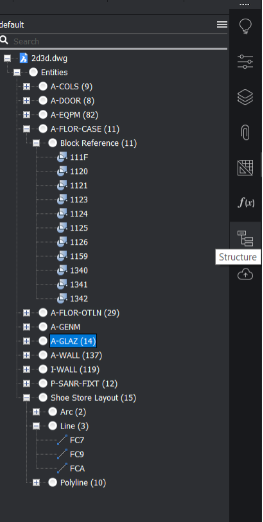
13 The Structure Panel
The Structure Panel (STRUCTUREPANEL Command) provides a birds-eye view of the entities that make up a drawing. It’s an easy and quick way to select categories or individual entities and then Show, Hide, Isolate or Zoom to them.
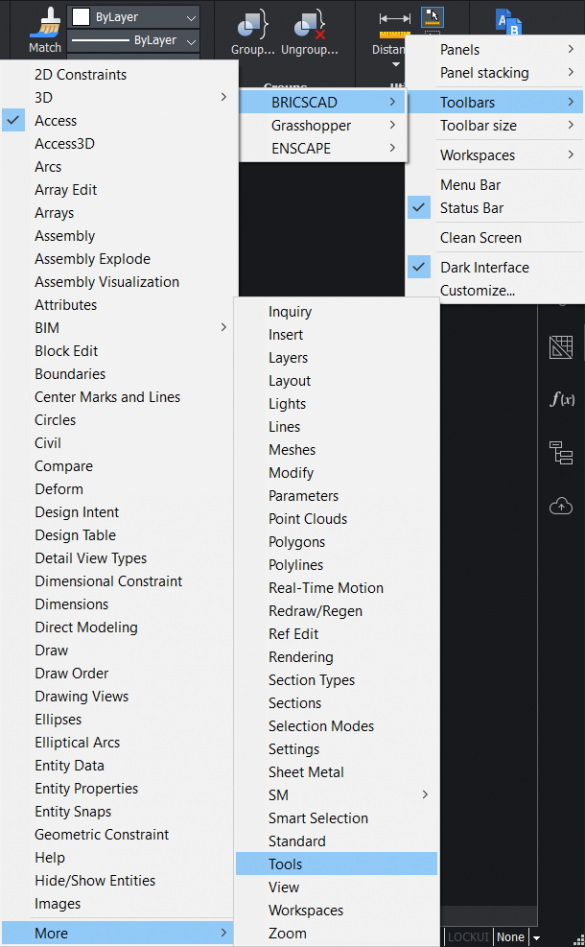
14 Panels and Toolbars
Quickly open or close any panel, including Layers, Attachments, and Structure, by right-clicking on the ribbon, toolbars or panels and simply selecting your desired panel. In the example below, Commandline, Properties, and Ribbon panels are all turned on. You can just as easily open or close any toolbars by expanding the BRICSCAD menu option.
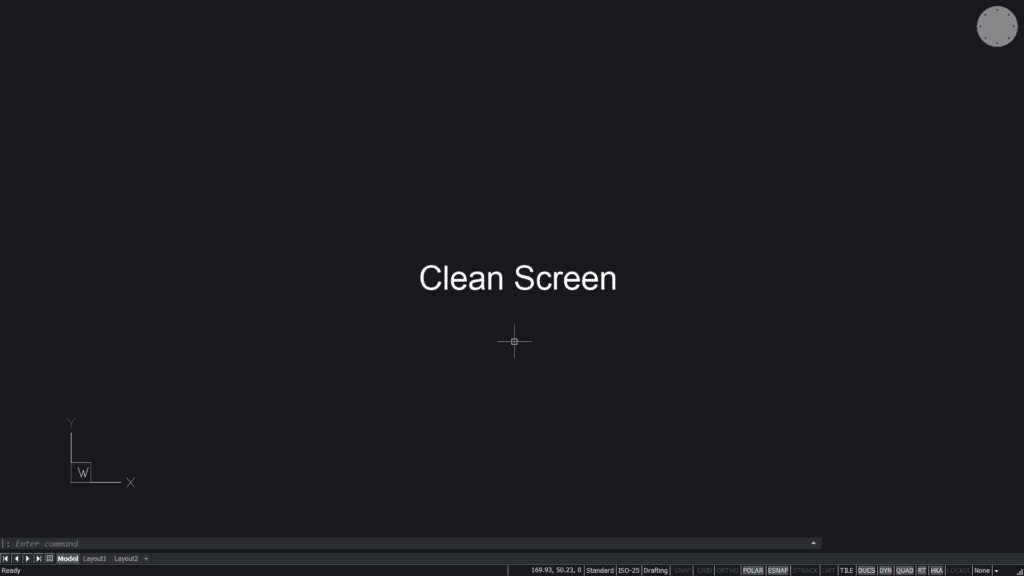
15 Clean Screen
Use the Clean Screen tool (CLEANSCREEN command) from the right side of the toolbar at the top of the application window for a clean and clutter-free workspace. It removes everything from your screen except your drawing area and command line. You can restore your previous workspace with the CLEANSCREENOFF command.
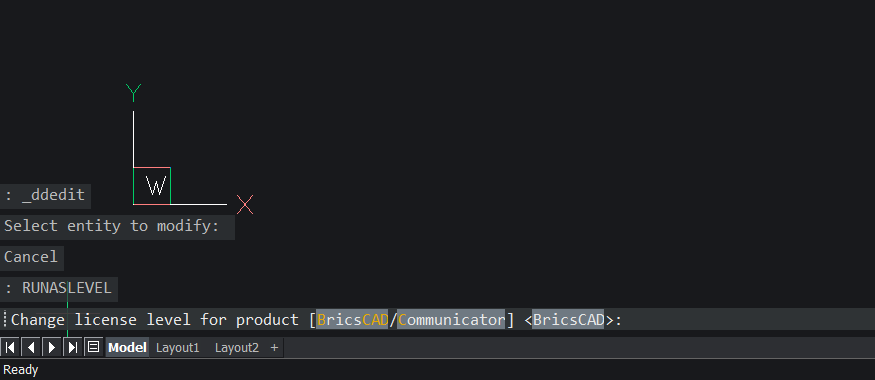
16 Choosing the right software
Use the RUNASLEVEL command to switch between the different license levels that are available with the BricsCAD trial. This can help you determine which software is right for you (Classic, Pro, Platinum, BIM, Mechanical, Ultimate, or Communicator). You’ll have to restart BricsCAD after changing the level and if you want to try Communicator for BricsCAD, you’ll have to download it.
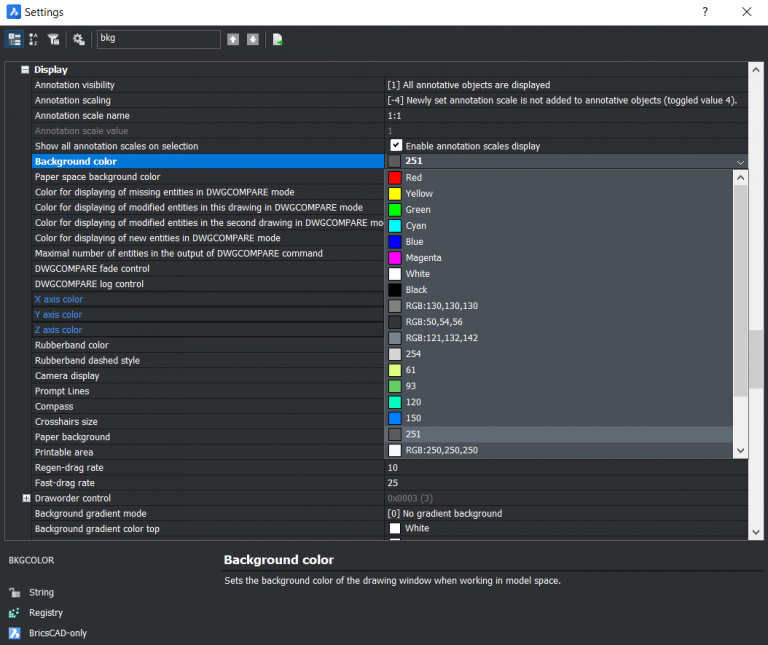
17 System Variables
You can type system variables at the Command prompt, just like in AutoCAD®. Or, use the Settings dialog box (OPTIONS or SETTINGS commands) to set any of the 900+ variables in BricsCAD. You can access the various settings by expanding categories, such as Dimensions, in the tree structure. Or, simply type relevant text in the search field. For example, enter ‘background color’, drawing window, or ‘bkgcolor’ to find the background color of the display. If the text you enter occurs for multiple variables, you can use the up/down buttons to cycle through all the relevant variables until you find the one you want.
18 Rollover Tips
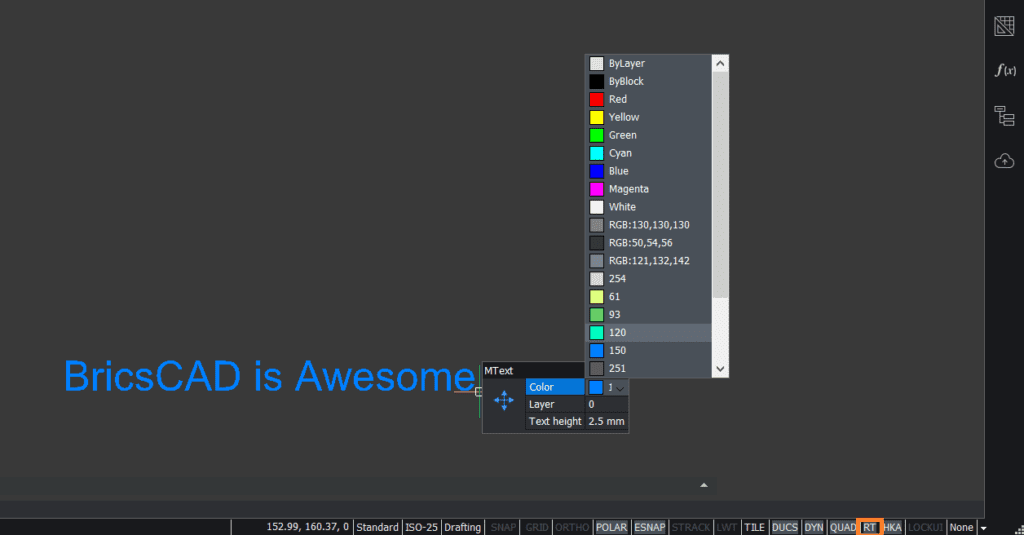
Conveniently turn Rollover Tips on and off using the RT control on the status bar (ROLLOVERTIPS command). When turned on, these tips are a great time-saver for both viewing and editing the most essential entity properties. For example, pass the cursor over an entity to view and modify the entity’s layer and color. Depending on the type of entity, you can also modify additional properties such as the radius of a circle or height of the text.
19 Hotkey Assistant
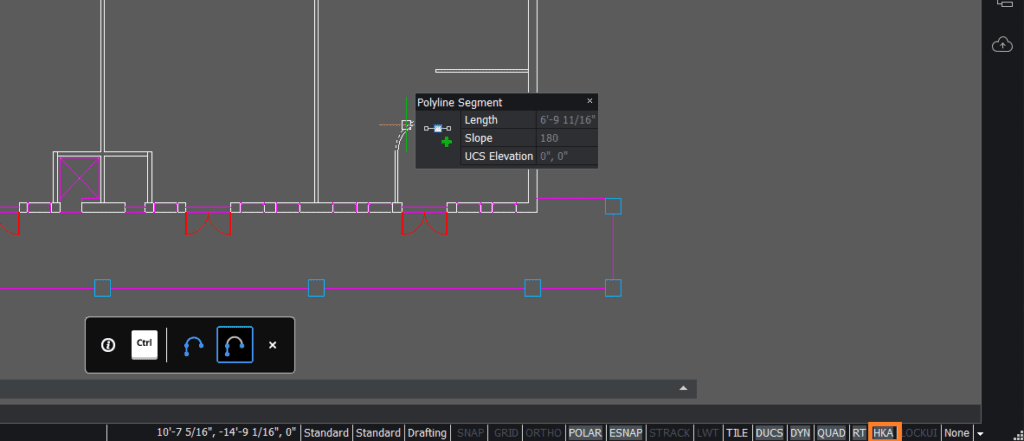
The Hotkey Assistant toggle on/off with the status bar (HOTKEYASSISTANT command) offers valuable tips for certain types of entities. For example, when enabled and you pass the cursor over a polyline, the Hotkey Assistant notifies you that you can press the Ctrl key to toggle between selecting the entire polyline or individual segments.
20 Import geometry
Import geometry from popular file formats to use as native BricsCAD entities. Use the IMPORT command to import CAD formats including Drawing Exchange Format (.dxf), SketchUp (.skp), MicroStation (.dgn), and Revit Family files (.rfa), to name a few. If you design for the mechanical/manufacturing industry, consider adding Communicator to your BricsCAD license. With the Communicator add-on, you can import models from other popular modeling applications including CATIA, Inventor, SolidWorks and more. And, the models import as native BricsCAD solids so you can edit them!

21 Blockify
Blockify (BLOCKIFY Command) is a powerful tool that can significantly speed up your drafting. Simply select a set of entities you’d like to turn into a block and respond to a few prompts. Within seconds, the Blockify tool replaces all sets of matching geometry with a matching block definition. If a matching block definition doesn’t exist, BricsCAD creates one. Quickly clean up your drawings and make them easy to edit in the future!
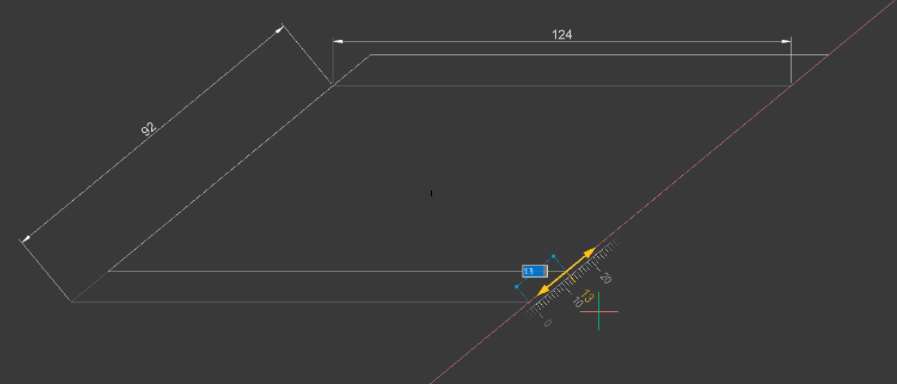
22 Nearest Distance
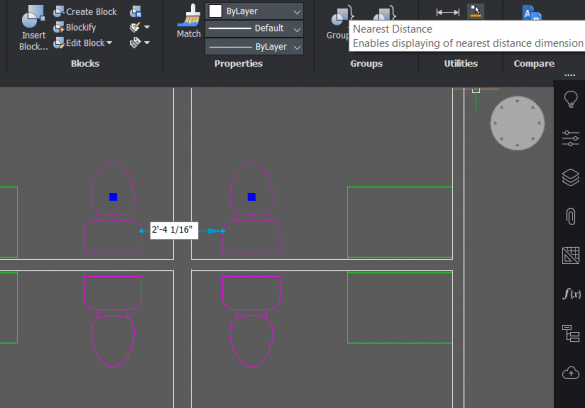
Use the Nearest Distance function to quickly find the shortest distance between two selected entities. You can also click on the given distance to edit it, moving the second entity to match the distance you’ve entered while keeping the position of the first entity.
23 Adaptive Grid Snap
Adaptive Grid Snap (SNAPTYPE = 2 to Activate) allows you to draw accurately with less input needed and will adapt depending on your level of zoom. It automatically adds a snap grid when editing or drawing entities that will change its accuracy, increasing as you zoom further into your object.
24 Copy Guided
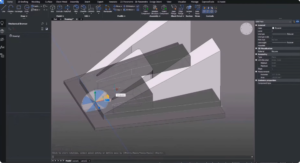
Use the Copy Guided tool (COPYGUIDED command) to copy geometry from one part of a drawing to another using temporary guide curves that automatically snap the geometry into place. Simply select entities like you would with the traditional COPY command. But, with COPYGUIDED, entities that fall completely within the selection window are included in the copy selection set. Entities that cross the selection window are used as guide curves. As you copy the selected entities to a new location with geometry matching the guide curves, the entities automatically align and replace existing geometry.

2 Comments
Greetings! Very useful advice in this particular article! Its the little changes that will make the biggest changes. Thanks for sharing!
I?¦m now not sure the place you are getting your info, however great topic. I must spend a while finding out much more or understanding more. Thank you for wonderful info I was searching for this information for my mission.