Drafting floor plans with 2D tools may seem fast initially, but managing changes in floorplans is a manual task that is prone to error – and when designs become complex, they become a lot more tedious. With BricsCAD® BIM’s 3D tools, you can deliver floor plans more quickly, efficiently, and without tedium.
How to create a floorplan in BricsCAD® BIM
BricsCAD® BIM is unique because it lets you work in a familiar plan view with Top View mode while maintaining the connection with the 3D space, making it easy to move between 2D and 3D views.
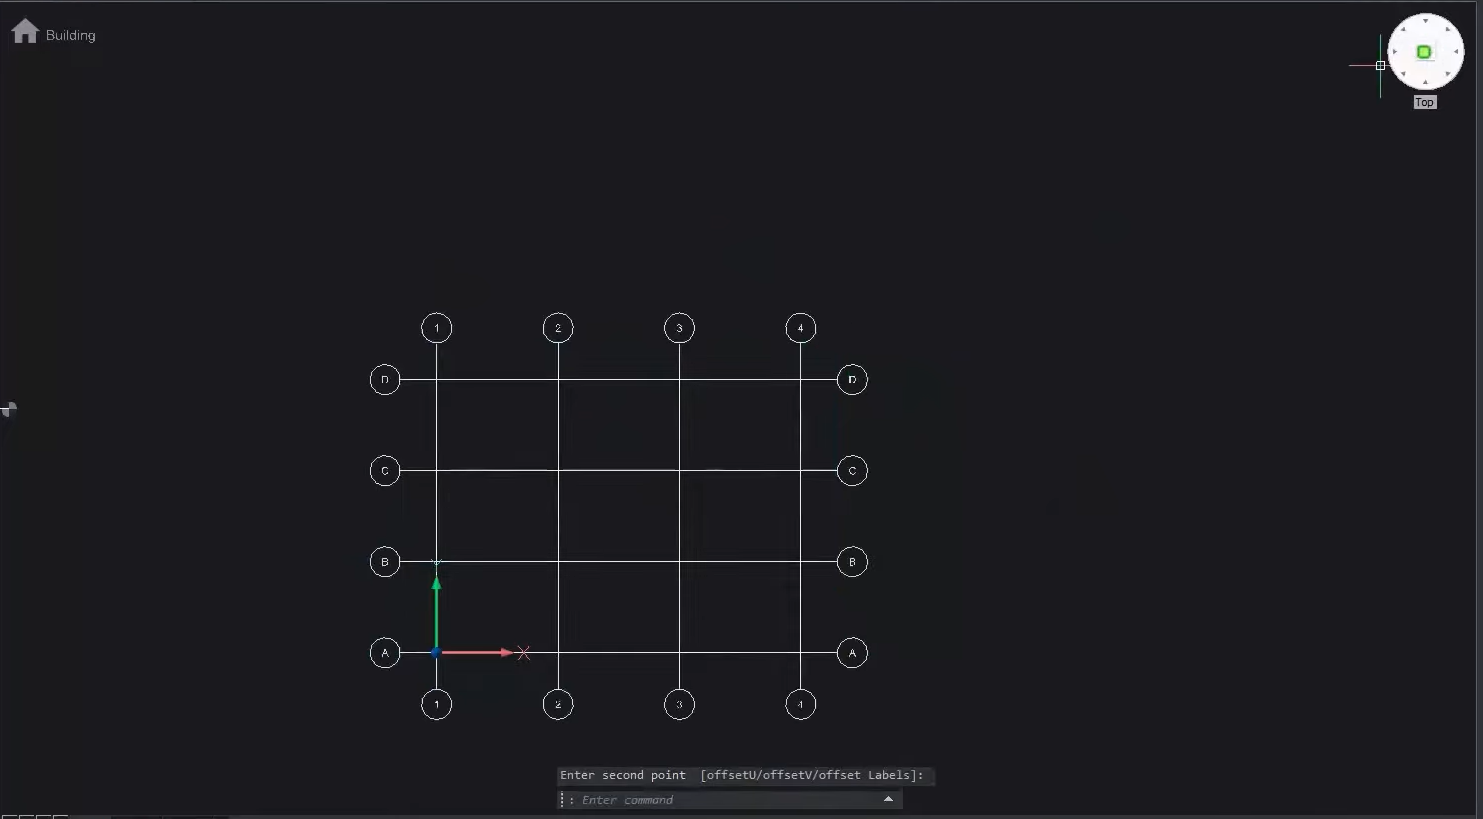
Tip! Start with creating a new building and a floor to keep your elements organized by assigning them to the right spatial location. You can create a simple grid using the BIMGRID command.
Create a floor:
- Create a floor by clicking the building icon at the top left corner of your workspace.
- Use the BIMGRID command to create a simple grid.
- Activate the floor in Top View mode.
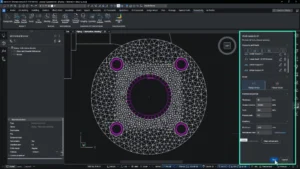
- Click on the Spot Elevation icon to activate it.
Tip! You can easily adjust the visible range for Top View mode with the slider on the left side of your workspace.
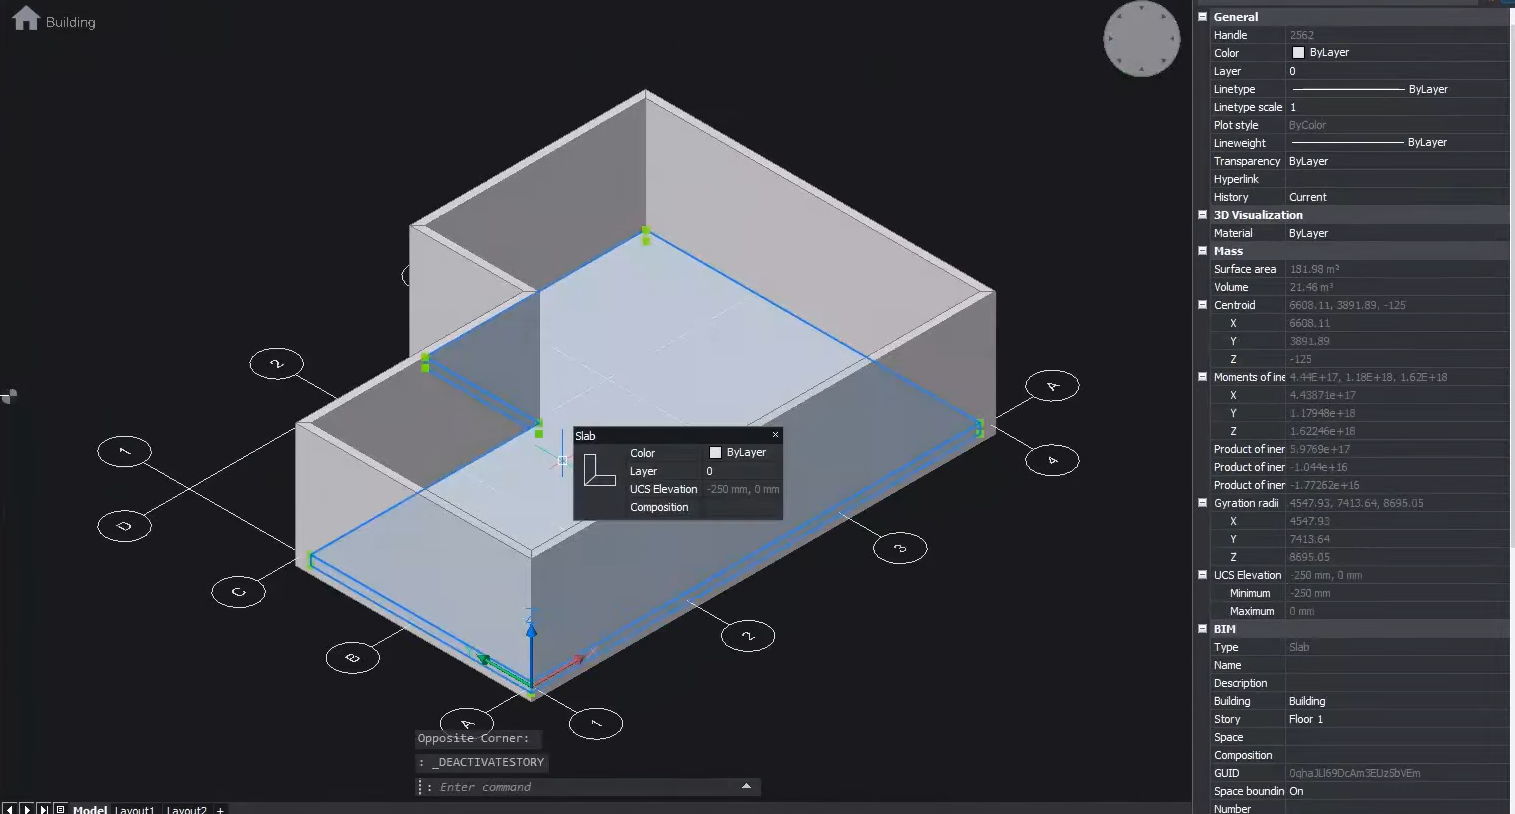
Create a building outline:
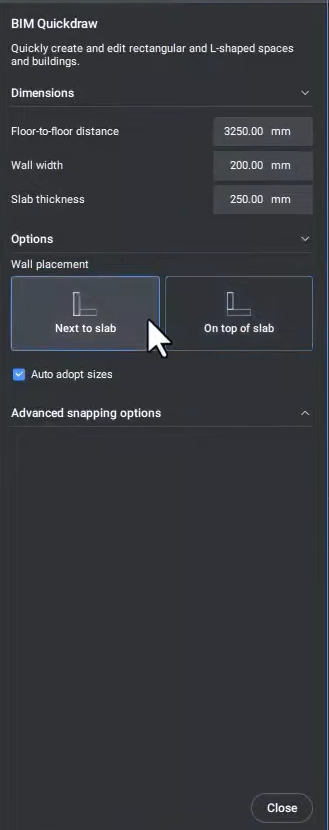
You can add or remove rectangles easily with BIMQUICKDRAW.
- Use BIMQUICKDRAW to control the geometry parameters and decide if you want your walls next to the slab or on top.
- Snap to the grid to create the first point.
- Then toggle the justification by hitting the control button. You can create a rectangular room in two clicks.
- Go to the advanced snapping options, turn on the entity snapping, and select the midpoint.
- Click on the inside edge of the wall, then drag toward the outside to add another rectangle to the current shape.
- Switch to 3D view to check the wall placement.
- Switch back to Top View mode to continue modeling.
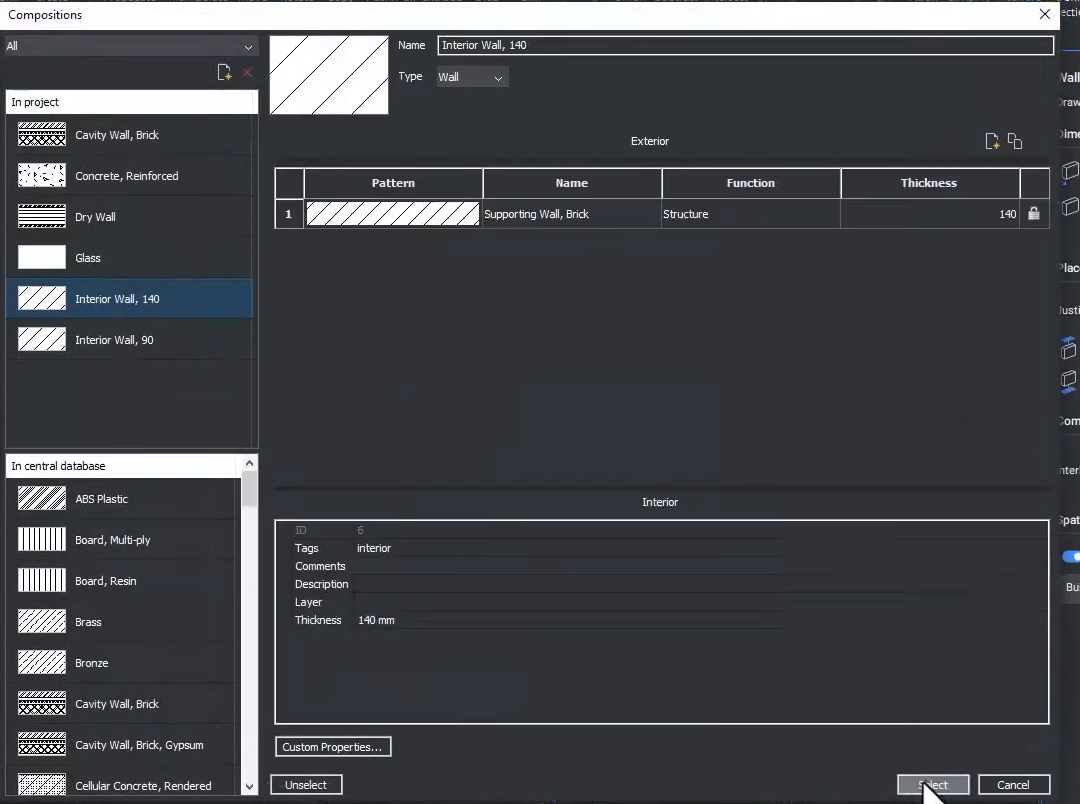
Create a linear wall chain (BIMWALL)
For drawing a more complicated linear wall chain, use the BIMWALL command.
- Assign a composition.
- Adjust geometry parameters in the settings panel on the right.
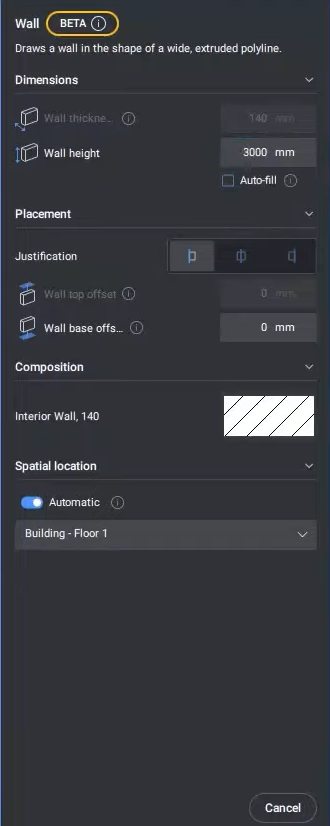
- Use the control button to total justification as you go.
- In Top View mode, create a 2D outline using the BIMWALL command.
- Create the corner using keyboard input to maintain accuracy.
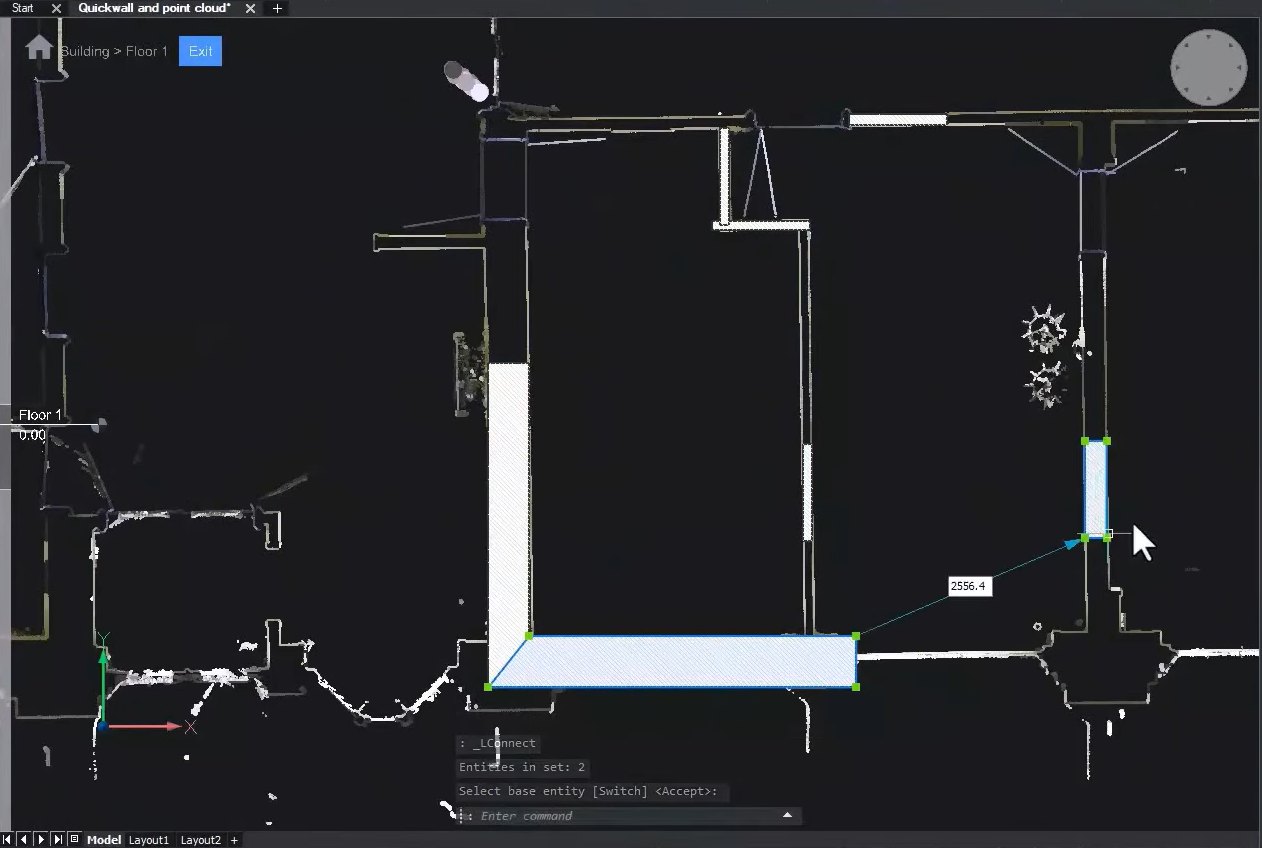
Create a simple wall (BIMQUICKWALL)
Tip! If you are working with a point cloud or a renovation project, BIMQUICKWALL will detect the wall width from the point cloud, create free wall segments, and connect them using BricsCAD BIM’s intelligent 3D tools.
- Use the BIMQUICKWALL command to add a single wall between two parallel walls. This will automatically connect visible walls in your workspace.
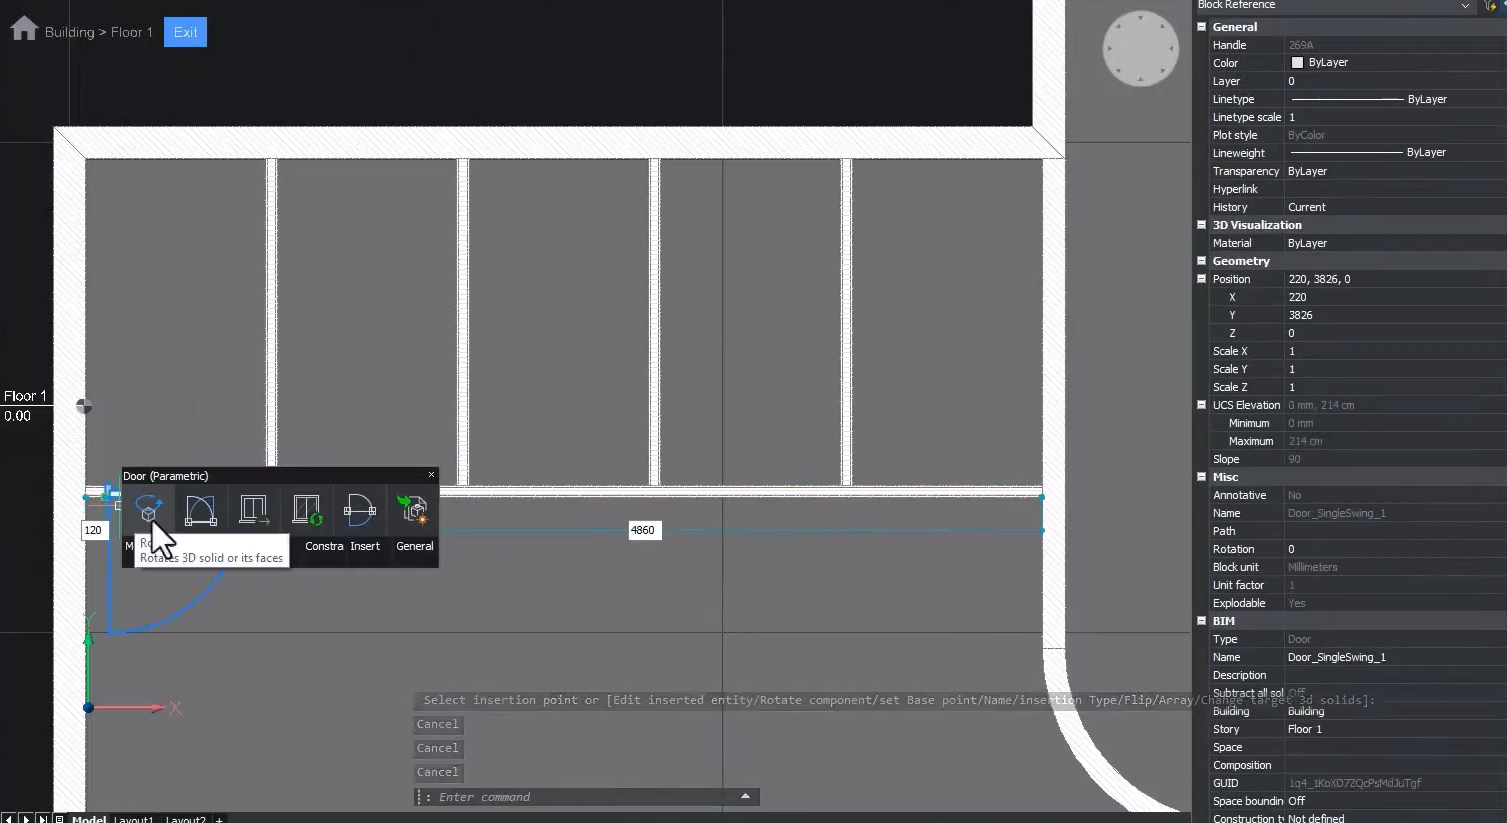
Add doors and fixtures:
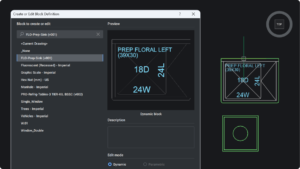
- In Top View mode, insert a door or fixture with the BIMINSERT command.
- The doors are parametric, so you can change the style or geometry if needed.
Add windows:
- Switch to 3D view.
- Use the BIMINSERT command to add windows from the default BricsCAD BIM library.
- Select the style that you need and insert it into the wall.
Create a 2D floor plan (BIMIFY):

- Enter the BIMIFY command.
- Navigate to the BIM Project Browser.
- Create a new sheet by clicking the blue plus button on the bottom right corner of the panel.
- Choose a naming standard, select the template, and a new sheet is created.
- Drag and drop the section from the BIM Project Browser to the sheet.
- You now have a 2D floorplan.
The finer details:
You can annotate your drawing using BIMDIMENSION or BIMTAG.
Add space labels and spot elevations, and your floor plan is complete!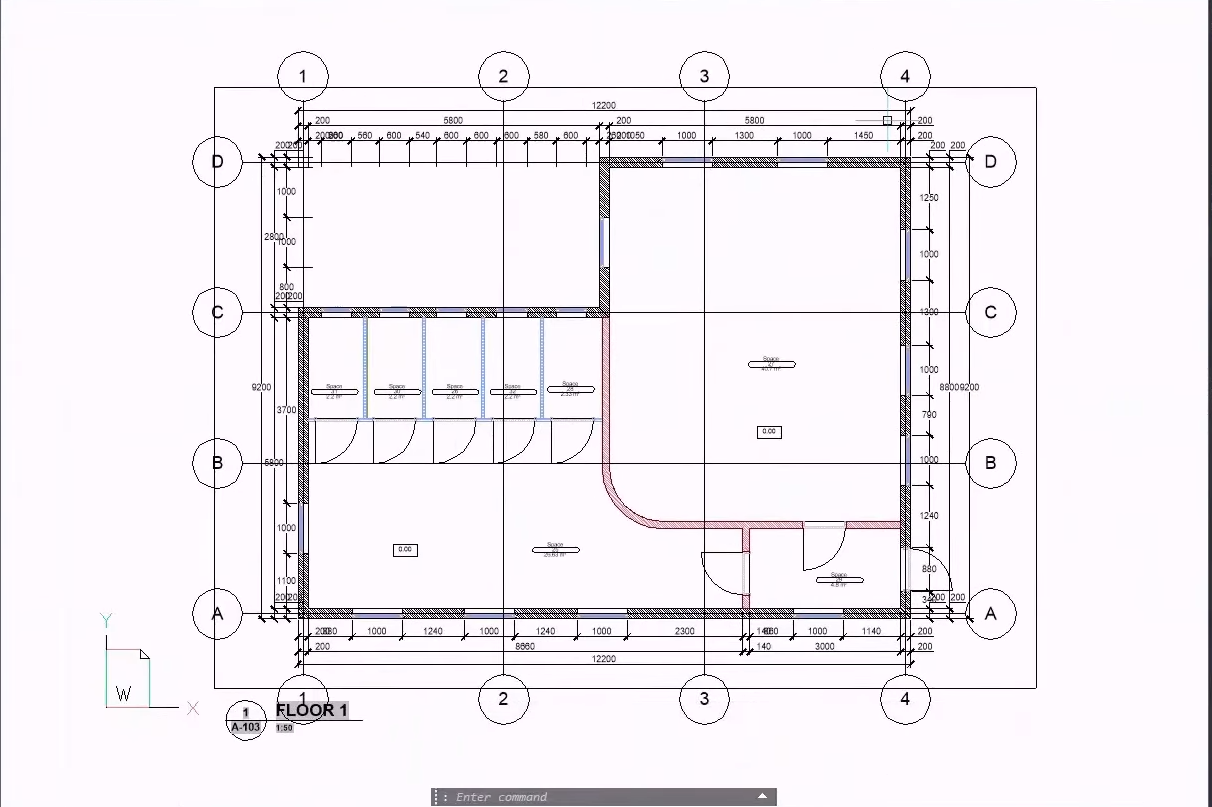
Have you used tried the new V23.2 features and have some ideas or suggestions?
Fantastic! We love hearing your thoughts on BricsCAD® – all feedback is welcome, whether good or bad. The best way to let us know what you think about BricsCAD or the new V23.2 features is to send us a support request, and our support team will be happy to help.